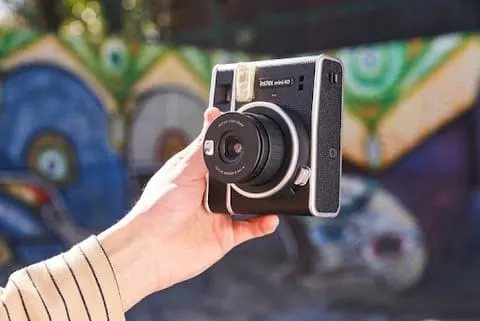
The Instax Mini 40 brings a vintage style to the company’s popular Instax range. When taking a photo, the worst thing you want is for the camera to stop working. A reset could resolve the issue if you find yourself in this situation.
To do a soft reset of your Instax Mini 40:
- Switch the camera off.
- Take out the batteries and reinsert them.
- Turn the camera on and check if the issue has been resolved.
If not, a hard reset can be done following the same method and pressing the shutter button for 5 seconds once the batteries have been removed.
Once you learn how to diagnose the issue, getting your camera operational again is easy. In this article, we will take you through the common faults you may experience with your Instax Mini.

How To Reset An Instax Mini 40
If your Mini 40 camera suddenly acts weird, a simple reset may be all that is needed to fix the issue.
Materials
- Instax Mini 40 camera
- New batteries
Tools
- A cloth to wipe the camera if dusty,
Instructions
- Turn the camera on.
- Open the battery lid and remove the batteries.
- Reinsert the batteries and close the battery lid.
- Turn the camera on and test to see if the problem has been solved.
Notes
You can try a hard reset if this method doesn't work.
How To Do a Hard Reset of An Instax Mini 40
If you have tried a soft reset of your Instax Mini 40 camera and it still isn’t working correctly, a hard reset is the next option.
- Switch off your camera.
- Remove the batteries and the film cartridge. Be careful when handling the film, as you don’t want to damage it.
- Press down the shutter button for 5 seconds. This allows the internals of the camera to reset themselves.
- Reinsert the batteries and the film.
- Power up your camera and try using it.
The hard reset is the primary way of fixing any camera issues. Once you have tried this and your camera isn’t working, contact Fujifilm customer support.
What Common Faults Require a Reset of An Instax Mini 40?
You now know how to reset your camera. Diagnosing your problem can help determine whether a soft or hard reset is needed. Here are some common issues when using your Instax Mini 40.

#1 Water damage.
Like any electronic device, water isn’t good for your camera. To avoid moisture entering the Instax Mini 40, don’t use it in wet conditions or locations with high humidity. Store the camera in a dry environment.
I recommend purchasing a carry case as an additional accessory for the camera. This small investment will save you from grief later!
If your camera does get wet, don’t panic.
- Turn off the camera.
- Remove the batteries and leave the battery compartment open. Also, take out the film and leave this area open.
- Place the camera somewhere warm and dry for 24 – 48 hours. This will allow the internals to air dry.
- Inspect the camera closely before reinserting the battery and film to ensure it is free from moisture.
#2 The battery contacts are corroded.
Water, or other liquid, entering the battery chamber can cause the contacts to degrade. If you have power issues with your camera, one reason could be that the connections are corroded. This issue is easy to detect by looking to see if there is rust or any similar build-up on the contacts.
If you notice corrosion, follow these steps to remove it:
- Take the batteries out of the camera.
- Dip a soft cloth or Q-tip/cotton swab into some isopropyl alcohol, then carefully clean the contacts.
- Let the battery chamber air dry.
- Place the batteries back into the camera.
To minimize the possibility of corrosion, keep your camera somewhere that is warm and dry.
#3 Instax Mini 40 flashing (or blinking) orange light.
When taking a photo, you may notice that the light by the viewfinder is blinking. This could mean one of two things: the flash is charging, or an issue with the camera.
A fast-blinking light indicates that the flash is charging. If the light blinks slowly or won’t turn off, it is due to a battery problem.
Try doing a soft reset to fix the issue. If that doesn’t work, you should swap out the batteries.
- Open the battery chamber and take out the batteries.
- Have a look to see if the contacts are corroded. If it is, then clean off the corrosion.
- Replace the batteries and turn on the camera. If the light still flashes, then use new batteries.
- Check once again to see if the light has stopped flashing.
#4 You could be using the wrong batteries.
The Instax Mini 40 operates via alkaline batteries. If you use any other type, you may find that your camera either doesn’t work or works intermittently. That is because non-alkaline batteries don’t provide the required voltage.
Another battery issue is placing them the wrong way in the camera. Always look carefully at how the batteries will be positioned in the chamber.
Using appropriate batteries and correctly placing them in the chamber will resolve most power issues.
#5 The Shutter button is stuck.
You’re taking a photo and discover that the shutter button is jammed. Usually, the issue is that something sticky has made its way onto the button. It may also be because some debris has fallen under or around the button’s casing, causing it to jam.
Giving the button a clean can fix the problem. Don’t use harsh chemicals when cleaning the button, as this can cause further damage to the camera.
- Gently clean around the shutter button using a soft cloth or Q-tip/cotton swab.
- If something is sticky on and around the button, dampen your cloth/cotton swab with warm water and then carefully wipe over the substance to remove it.
- Gently press the shutter button to see if the issue is fixed. If you still sense some resistance, then repeat the cleaning process.
Taking Care of Your Mini 40 Camera
Giving your camera the TLC it needs will ensure that your Instax Mini 40 performs at its best. Maintaining your camera doesn’t require much.
- Keep an eye on the battery level. You will get around 100 shots from the batteries that are included with the camera. When you get close to the 100, it may pay to put the batteries into a tester to ensure they still have enough power. If you’re in doubt about the batteries, use a fresh set.
- Use a soft cloth to remove dirt from the camera or the viewfinder. Never use alcohol or harsh chemicals when cleaning the exterior of the camera.
- The chemicals in mothballs can affect the camera. Never store the camera in a drawer or similar location where there are mothballs.
- Remove the batteries if there are extended periods between when you use the camera.
- Give the camera a regular clean on the outside and inside.
Mini 40 Reset Verdict
Most issues with the Instax Mini 40 can be traced to the batteries. Always use alkaline batteries and keep the brand of battery the same. If you have a problem with your Instax Mini 40, a reset could resolve it.
Try a sort reset first, then move on to a hard reset if you are still experiencing an issue. If a reset doesn’t help, you must call customer care or a repair agent.
READ NEXT: Instax Mini 40 vs Mini 11: The Ultimate Instant Camera Face-Off